
Setting up a Raspberry Pi
Use RP Imager
Note
If your micro SD card already has data on it, you can first use the Raspberry Pi Imager
to erase (reformat) the card. With the card inserted into the machine, in Imager, under
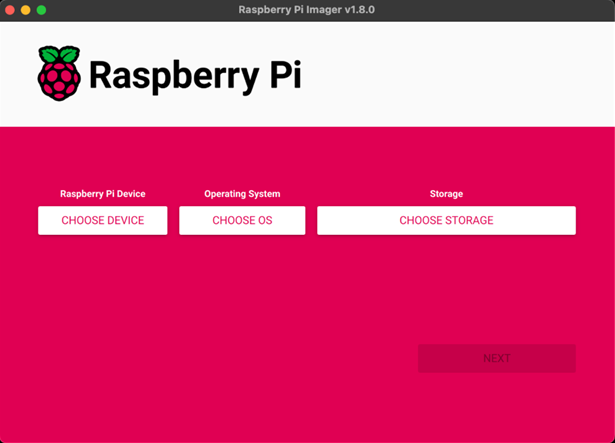
Raspberry Pi Device choose No filtering, under Operating System choose
Erase, format card as fat32, and under Storage choose the micro SD card.
Install the latest version of Raspberry Pi Imager on a computer connected to your network. Connect a micro SD card to that computer, open the Imager and make the following configurations:
| Startup page | |
|---|---|
Raspberry Pi Device |
Raspberry Pi 5 |
Operating System |
Raspberry Pi OS (64-bit) Raspberry Pi OS (other) >> Raspberry Pi OS Lite (64-bit) |
Storage |
Select the micro SD card |
On the development machine we used the regular OS, on the server we used the Lite version.
Click Next
Click Edit Settings
| General tab | |
|---|---|
hostname |
defines the hostname of your machine |
Username |
defines the username of the admin account |
Password |
defines the password of the admin account |
SSID |
name of your WLAN |
password |
passkey for your WLAN |
Wireless LAN country |
US |
Time Zone |
pick yours |
Keyboard Layout |
us |
For the username and password of the admin account, use only lowercase letters; some users have reported bugs.
| Services tab | |
|---|---|
Use password authentication |
See the official docs discussion of the two SSH options.
Click Save
Click Yes to apply OS customization settings
Click Yes to overwrite disk
Wait for completion & verification
Image completed when you see Write Successful message.
Wired vs. Wireless
We have our Raspberry Pi machines connected directly to our WiFi router using ethernet cables. Above, we configure the wireless LAN. This means there will initially therefore be two IP addresses assigned to each Raspberry Pi configured this way, one for the wired connection and one for the wireless connection. We thus disable WiFi on the Raspberry Pi because we wish to use the wired connection in hopes of having consistently better speeds and to reduce the burden on the hardware (i.e. the WiFi chip).
But why enable wireless LAN in the first place? Because it is now easy to re-enable WiFi if ever desired.
You may choose to use either wired, or wireless, or even both if you really want.
Optional: save firstboot.sh
If you wish to boot your Raspberry Pi’s OS from a drive connected to the PCIe interface, then do the steps in this section; otherwise, skip to the next section.
After completing the steps above to write an OS image to a micro SD card, remove and then re-insert the card in the same machine – this will allow you to access the card as a storage device; initially after writing the image to the card your machine will likely see it as a bootable drive and not allow you to access its files.
Copy the file firstboot.sh from the micro SD card to somewhere on this machine.
This file will be used later when we configure the Raspberry Pi to boot from an NVMe SSD connected to the official Raspberry Pi PCIe-to-M.2 HAT+.
First Boot
Remove the micro SD card from the machine used to burn the image.
Make sure the Raspberry Pi machine is shutdown, and remove the power cord.
Insert the micro SD card into the Raspberry Pi machine.
Power up the Raspberry Pi machine.
On another machine connected to the same network, perhaps the one just used to burn the OS image, open a terminal (Linux/MacOS) or a command prompt (Windows) and open an SSH connection to the Raspberry Pi using:
$ ssh [user@]<hostname>
using the user and hostname you just entered in the Imager, above. This should work since we enabled SSH when creating the OS image.
Tip
When you first try to SSH into the Raspberry Pi it is possible that the SSH program will not allow you and throw an error message/warning saying something about a possible “man-in-the-middle” issue. This might happen if you already had this Raspberry Pi machine setup previously to SSH to the current machine being used (this happened to us when we re-installed the OS on an existing Raspberry Pi machine). Basically, the SSH program is telling you that the SSH key it is seeing on the Raspberry Pi – the one created when we enabled SSH in the above process of getting the OS to a micro SD card – is not the same one it sees in its list of existing keys for that machine.
Don’t worry, there is an easy fix: on the machine you are using to SSH into the Raspberry Pi, run:
bash
$ ssh-keygen -R <hostname>
where <hostname> is that of the Raspberry Pi. This will remove all the duplicate keys for the Raspberry Pi on the current machine, and you should have no more problems trying to SSH.
Enter the Raspbery Pi user’s password, and you should then see the Raspberry Pi’s terminal:
user@hostname:~$
On the Raspberry Pi run the following:
$ sudo apt update && sudo apt full-upgrade
Static IP
Through an SSH connection to the Raspberry Pi, run this to find it’s IP address:
$ hostname -I
You might see two IP addresses!!
If you’re like us, and have the Raspberry Pi connected to your WiFi router via an ethernet cable and have also enabled WiFi when creating the OS image, then you will see two IP addresses.
In our case, we only want to use the wired connection, but now have the ability to easily turn on and off the Raspberry Pi’s WiFi whenever we want.
To disable WiFi open the file /boot/firmware/config.txt and add this as the last line of that file:
dtoverlay=disable-wifi
This line should be just under the [all] heading at the bottom of the file. Then reboot the Raspberry Pi using
$ sudo reboot
In your router’s settings, give the Raspberry Pi machine a static IP address.
SSH
SSH is disabled by default on Raspberry Pi OS; it can be enabled using any of the four following methods below. If you didn’t already enable SSH when creating the OS image, you can use one of these.
On desktop
>> Raspberry Pi icon
>> Preferences menu
>> Raspberry Pi Configuration
>> Interfaces tab
>> Select "Enabled" next to SSH
>> Click OK
While flashing an OS image
As we did above in the section Use RP Imager
From the terminal
$ sudo raspi-config

>> ```Interfacing Options```
>> Navigate to and select ```SSH```
>> Choose ```Yes```
>> Select ```Ok```
>> Choose ```Finish```
Manually
Create an empty file named ssh in the boot partition:
$ sudo touch /boot/firmware/ssh
Reboot the machine:
$ sudo reboot
SSH without Password
On a machine that you wish to be able make an SSH connection to the Raspberry Pi without entering a password, run the following:
$ ssh-copy-id [user@]<hostname>
where [user@] and <hostname> are that of the Raspberry Pi.
Enter the Raspberry Pi user’s password (for the last time … yay!).
Now you can run
$ ssh [user@]<hostname>
to access the Raspberry Pi’s terminal without needing to give a password.
To suggest an edit or correction to this page, please click the "Edit this page" button below or at the top to access the source file on GitHub.